
In a presentation related to the Disaster theme of the conference, speakers Colford and Christie spoke of the recovery of flood damaged photographic collections of the Peterboro Municipal Archives, in Ontario in 2004. The area wide disaster created such demands on affected infrastructure that the response began two weeks after the peak flood, which led to a decision to freeze all the of works, including glass plates and film negatives as other methods of drying had not been possible. The PMA participated in a CCI risk assessment which reported back with recommendations to keep all film stabilized in freezers for continued cold storage, and to identify cellulose acetate negatives as a specific priority for treatment due to their autocatalytic behavior, leading to eventual change and loss of values.
The authors, looking to Pavelka & Naipavel-Heidushke’s paper on successful treatment and separation of gelatin image layer from acetate support, called out Pavelka’s suggestion that insurance companies might provide financial assistance for treatment in their coverage. Following the protocol suggested in the article, the authors proceeded and achieved inconsistent results. They noted the process per negative could take up to ninety minutes, resulting in only four negatives treated over two days, They cited concerns of prolonged exposure of the negative to solvents, yet found it hard to keep solvent from evaporating, which could induce curl and tensions while drying. A new question developed, what was the difference between the article’s case studies vs. theirs? An obvious variable was the fact that these items had been frozen. Whether or not this actually factored into the negatives’ behavior. Consulting further with Greg Hill (currently of the Canadian Conservation Institute) & Gayle McIntyre (Sir Sandford Fleming College), the protocol was revised to include the following steps, which helped increase the reliability of the method across different negatives:

1. Remove material by cutting away some of the lip/edge of the negative to allow ingress of solvent
2. Prewet the negative using sequential solvents
3. Use visual and tactile clues to determine the moment of separation (need slide 3.1, 3.2.) not a fixed amount of time
4. If the gelatin is still disrupted, reshape while it is still wetted using gentle prodding (with brushes on silicon release Mylar*) to lay flat before drying completely. The unsupported pellicle, thin as tissue, can be left to release final residues of solvent in a non-stick drying pack in fume hood to offgas.
(More images of these steps available in the downloadable Kiss Your Acetate Goodbye images of layer separation, pdf file kindly provided by the speakers.)
The images, now supported on Mylar sheets, were digitized, and the storage solution after treatment includes use of polypropylene sleeves in a clamshell binder. In an added benefit, the items are no longer taking up space in cold storage. The authors report that after eight years, the images appear unchanged in these conditions. While having a positive outcome, the speakers note that is still a lengthy process involving time and material costs, requiring trained professionals. This technique may not be a catchall for all collections, but for prioritized ones, it can be effective management tool for severely decaying negatives.
*Additional note: Silicon tip tools may also be useful here. See related content from 2016 BPG Tips Session on Silicon Shapers, as found in art supply stores today among the brush selections for working thick paints, in the BPG wiki.
Category: Photographic Materials Conservation
44th Annual Meeting – Workshop, May 14, "Gellan Gum Applications for Paper-based Objects"
I was very excited to see Gellan Gum Applications for Paper-based Objects listed on the workshops for AIC/CAC, but I was also a little worried about signing up. My familiarity with gums in paper conservation was limited to reading the odd DistList posting. Would it be too technical? Would I be in over my head?

I shouldn’t have worried. The facilitators from Library and Archives Canada and the Canadian Conservation Institute put me at easy immediately, and the group introductions reassured me I wasn’t the only novice in the group.
We began the morning with a presentation covering both a theoretical and practical introduction to gellan gum. Crystal Maitland did an excellent job of explaining the science behind the use of gellan gum without overwhelming us with too much technical detail. After the getting the theoretical grounding Doris St-Jacques, Greg Hill and Anne Maheux took over and shared some of the practical treatments which had been performed at CCI and LAC.
From there we headed down to the Canadian Centre for Architecture’s inviting lab. It’s always exciting to visit another institution “behind the scenes” and CCA’s facilities did not disappoint. Despite the large group everyone had their own workspace prepared for them with all the tools and samples we’d need for the day.
One of the real strengths of the workshop was exactly how much hands-on experience we gained. We split in to two groups to watch Doris and Greg prepare batches of gellan gum and then in to groups of three to give it a try ourselves. The process proved to be fairly simple, especially with the help of the excellent workshop leaflet. It included clear instructions and my favourite kind of diagram – one which does all the ratio math for me! In addition to the recipes the leaflet also included figures outlining the order of layers for different kinds of gellan gum cleaning and instructions for bleaching and deacidification. All together a very useful document.


Every participant was provided with a print which had been cut in to four sections for testing cleaning, deacidifying and bleaching. Many participants also brought their own samples. This was an excellent bonus, allowing everyone to see the effects on a wide variety of materials.

Each group began by mixing up their own batch of gellan gum. These set by the end of the day, allowing us to test our handy work, but the facilitators had also prepared a large number of sheets of with a variety of concentrations and additives. It was very informative to be able to play around with the assortment. Very few institutions have to resources to create such a wide variety of gels just to allow their conservators to gain the experience of the different properties, making this an invaluable experience
.
The gellan gum workshop accomplished something I was sure was possible at the start of the day. It allowed me to leave feeling confident enough in my skills that I’m looking forward to trying out gellan gum in my own lab. And if turning an intimidated rookie in to a confident tester isn’t the sign of a great workshop then I don’t know what is!

44th Annual Meeting – Photographic Materials Session, May 15, “Analysis of Historical Tintype Plates: Materials, Methods and Manufacturers” by Dr. Corina Rogge
Dr. Corina Rogge, the Andrew W. Mellon Research Scientist at the Museum of Fine Arts, Houston, presented a very interesting (and thorough) talk on the “Analysis of Historical Tintype Plates: Materials, Methods and Manufacturers” giving a brief overview of the tintype process and the ongoing project to characterize their material properties. The analysis was undertaken on a study collection involving 226 unknown tintypes.
Despite the popularity of the process, there were only three patents filed in its history, and how they were actually made is poorly known. Hamilton Lamphere Smith and Peter Neff first patented their process for a collodion image on a japanned surface in 1856. Their melainotypes, so named from the Greek melano, or black, consisted of a varnished image layer on the japanned iron plate, also varnished verso. Peter Neff was interested in the commercial properties, including japanning purchased plates. He sold prepared plates, as well as licensing the process for use. The plate itself was not patented. Victor M. Griswold patented a competitive process also in 1856, using bitumen on an iron plate, and called them ferrotypes to indicate the iron content. There were eventually several plate manufacturers including Neff, Griswold, Dean & Co., and Phenix; however, only Neff and Griswold stamped their plates.
Tintypes were affordable, durable and accessible, and became widely popular in mid-1800s America, and really came to represent the middle class. They are not as common in museum collections, but a large number survive as family and historical items. Dr. Rogge noted that the market and development of the process were strongly economically driven, and the producers found a need to create trends to keep their edge or drive sales. For example, Griswold began to name and sell imperfect plates as “eggshell,” in addition to glossy plates.
Dr. Rogge’s study sought to determine whether different manufacturers used different materials, and if so, whether they be differentiated and dated. X-ray fluorescence spectroscopy (XRF) analysis revealed mostly iron, as would be expected for the plate. A smaller number contained manganese, but didn’t seem to correspond to a trend. There were no major differences in thickness, aside from very early Neff plates being thicker. These very were fairly quickly thinned down to the typical size, making them cheaper to manufacture and mail. Griswold used thicker plates only very briefly.
Organic analysis was carried out on the japanning layer by pyrolysis gas-chromatography (py-GC-MS). There were no particularly unusual result, as might be expected for a commercial process. Drying oil was the most common component, then pine resin, followed by a small number containing shellac. Asphaltum, which Dr. Rogge pointed out is difficult to work with, was found in fewer than 10% of the plates although it is mentioned in two of the three patents ever filed.
Microscopy determined the most common pigments of the japanning layer to be carbonaceous blacks, as given in the Neff patent, and iron earth pigments as given in the later patent. Plates were sometimes advertised as chocolate or black, and an effort was made to differentiate between the two. Colorimetric analysis ignored the CIE b* parameter (blue-yellow) to accommodate the assumed yellowing of the varnish. CIE a* when checked against manganese didn’t correlate. In attempting to differentiate the bare support versus japanning layer with support, the thickness of the japanning layer seemed to have much more influence. However, Dr. Rogge believes further study may prove chocolate plates (more red) correlate to the use of iron earth pigments in the japanning layer.
Relatively few plates had a single japanning layer, while many had two or three. Though the practice is not indicated in any of the patents, it is mentioned in articles of the time on how to make tintypes. Though multiple coats would increase the cost and difficulty of production, they would provide a smoother, glossier surface. In addition, a more pigmented bottom layer (a ‘face coat’) might serve to isolate and protect pigments from reactive image silver, and approximate the depth of an ambrotype by allowing more light to pass through.
Dr. Rogge pointed out that the project needs more data but points to the possibilities of trends and potentials for identification. She noted also that the actual plates varied significantly over time, and differed between manufacturers and particularly from the patented processes. For example, Neff plates may have more layers as time goes on, and Griswold plates may be associated with profiles containing asphaltum, drying oil, pine oil and shellac. Such an ability to profile the plates would give the possibility of identifying and dating unknown plates.
44th Annual Meeting, Photographic Materials Session, May 17, 2016, "Methods for Cleaning Brass Mats from Cased Photographs" by Christophe Vischi, Ariane Lalande, John McElhone and Chloé Lucas
Christophe Vischi and Ariane Lalande presented a talk on practical tests they conducted to determine how to clean brass mats of photographs from the collection of the Colby Curtis Museum, Stanstead, Quebec. These mats suffered from multiple corroded spots (which I know as pitting corrosion from industry), containing stable Cu2O cuprite and active atacamite Cu2Cl(OH)3. They compared two electrochemical methods and the use of an ion exchange resin to treat the mats:
– spot electrolysis using an EDTA electrolyte and at 9 Volts,
– brushing an glycerine electrolyte on the object, wrapping it in aluminum foil and laying it a humid chamber
– use of the ion exchange resin, Amberlite IR 120 HM. This comes in the form of beads, which were applied locally on the object as a poultice using a fine brush.
The authors did not obtain good results with the electrochemical methods, with staining being a problem for the spot electrolysis, and a gray patina a result of the wrapping method. They chose the method using the ion exchange resin. It was found that grinding the beads before application improved the results. Very local cleaning was possible, and the solution could be rinsed off with a mixture of ethanol and water. Still, there were flecks left where the pitting corrosion was, but these could be retouched to match the finish. Care had to be taken to avoid staining uncorroded areas. The result appeared to be satisfactory, and they want to continue work on optimizing this method.
I would like to note that electrochemical methods should not be ruled out based on this paper. When performed properly, electrochemical cleaning can be used to clean most metals found in museums. C. Degrigny, among others, has demonstrated that local electrochemical cleaning can work under properly controlled conditions (cathodic potential/voltage), using the proper equipment, and electrolytes. The aluminum foil method might have worked if the objects were not wrapped (traps the reaction products), and the proper electrolyte was used. If I heard correctly, glycerin was used as the electrolyte, but it is non-conducting, so it could not have worked.
44th Annual Meeting – Photographic Materials Session, May 17, "Salvaging Memories: The Recovery of Fire-Damaged Photographs and Lessons Learned in Conservation and Kindness," by Debra Hess Norris
They say a picture is worth a thousand words, but its worth is immeasurable when all other possessions are lost. The efforts of the Winterthur/University of Delaware Program in Art Conservation can be described, therefore, as invaluable. For the past two academic years, Debra Hess Norris and the faculty, staff, and the graduate students of the WUDPAC program have undertaken recovery projects for photographs damaged by fires and floods. In addition to the rigorous course load of the Photographic Materials block at WUDPAC the classes of 2017 and 2018 have added examination, documentation, and treatment of between 240 and 260 photographs, or about 25-35 photographs per student. Their goal was to help people and families who have just survived heartrending disaster.
On Christmas Day in 2014, Ricky and Traci Harris lost their three sons and Ricky’s mother to a devastating house fire. Searching for any way to lessen their grief, friend and WUDPAC PhD candidate, Michael Emmons, sent this image to Ms. Norris via text message:

One of the firefighters had taken the time to collect the fire-damaged photographs and lay them out in the Harris’ garage. Mr. Emmons coordinated with Ms. Norris to have the 260 photographs brought to the Winterthur conservation labs where the first-year graduate students began examining them for treatment. Each individual photograph had a unique variety of damage. By working closely with Mr. Emmons as the Harris family liaison, the students were able to approach treatment with approval and context from the family. The emotional nature of the project was the biggest, but not only, struggle for those involved. Condition concerns ranged from minor planar distortions to an irreversible white haze to the bleeding of inks and dyes. After minimizing the smell of smoke by storing the photographs with zeolite and blotters, students focused on surface cleaning and flattening. The stabilized photographs were then housed in polyester sleeves with zeolite-containing papers to increase the ease of future scanning.
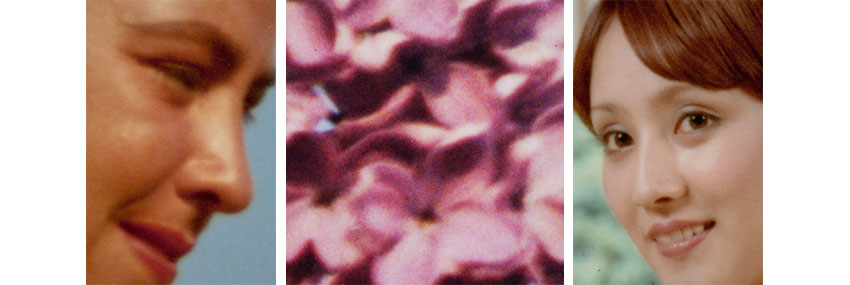
May 24th, 2015 a flash flood hit central Texas with waters reaching 33 feet high in a matter of hours. 30 lives were lost and over 1,000 homes were damaged. As with the Arno floods that formed the theme of AIC’s 2016 Annual Meeting, compassionate volunteers and first responders attempted to salvage photographs and other personal belongings. Local archivists were able to do much in the recovery of the photographs, but 240 of the most severely damaged were sent to Winterthur for their new graduate students. The types of photographs sent ranged from tintypes to digital prints, negatives to photo albums and all suffered severe damage ranging from flaking and delamination to inactive mold. Although there was a wider variation in materials than the fire-damaged photos from the previous year, the primary treatment concerns remained surface cleaning and flattening but also included consolidation, tear mending, and unblocking. Each student was also able to choose one photograph for loss compensation as both an educational exercise and an attempt to make the most severely damaged images more cohesive. In both projects, students progressed from dry to wet cleaning techniques as detailed below and routinely used microscopic examination to assess their progress and analyze different techniques.


Left: Dry Surface Cleaning Techniques, Right: Wet Surface Cleaning Techniques
Different approaches were also needed for fiber-based supports vs. resin-coated supports, again detailed below:


While the educational opportunities of these projects were immense, what I find truly remarkable is the way they inspired and reflected compassion and benevolence both inside and outside the field of conservation. The subject matter clearly resonates with many of us as there was not a dry eye by the end of Ms. Norris’ presentation and the Q&A section was filled with heartwarming remarks and suggestions for how to continue and spread these outreach efforts. Additionally, the public reactions to various press and social media resulted in an inundation of offers for volunteer work, especially for the Harris family. So I would like to end with Ms. Norris’ call to action, “As a profession we must seek ways to share our skills and knowledge broadly, to be a visible presence following unthinkable tragedy, and a known resource for families facing the potential loss of their treasured photographs.”

For details on D4 and its use in photograph conservation, Ms. Norris suggests Shannon Brogdon-Grantham’s abstract entitled “New Approaches to Cleaning Works on Paper and Photographic Materials” from the 2015 Biannual PMG Meeting.
44th Annual AIC Meeting – Photographic Materials and Research and Technical Studies Session, May 15, "Colour Photographic Prints Brand by Spectral and Statistical Analysis", by Christine Andraud
Heritage conservation tends to focus on what has been admired for many centuries. Other specialties, such as photographic materials, have only been around for a relatively short period of time. Photography is nonetheless a compelling medium with an array of different processes and variants within them. Research in this field shares the same goals as the one done for other materials: to better understand how, when and where objects were made, what conditions caused them to deteriorate and ultimately how to best preserve them. Studies such as the one presented by Christine Andraud at the AIC-CAC conference aims to bridge the knowledge gap in the field.
As Andraud states in her abstract, color photographs, particularly those classified as chromogenic, lack the kind of study that black and white processes have already received. This is exactly what caught my attention: why is that? Although we are now in the digitally born media age, color photographs have been commercially available since the late 1940s. Until not that long ago, they were the most common type of photographic technique, used by artists and amateurs alike. Today we can find examples of chromogenic prints in fine-art museums as well as in personal archives. Their widespread use is exactly the reason why they should be studied further.
For the purpose of identifying these types of prints analytically, Andraud used fiber optical reflectance spectroscopy (FORS). This is a non-destructive and non-contact technique that has long been used to analyze pigments in paintings. The same technique can also help us in the identification of dyes used in photographic emulsions. Better results are obtained when the device is placed in contact with the sample, but according to Andraud, this doesn’t seem to cause damage.
Dyes used in photography were not always the most chemically stable. In fact, their formulas changed often precisely to change this trend and improve their reliability. The appearance of these photographs can be quite different from the one they had when they were made. Consequently, their visible spectra have almost certainly changed. It is therefore considered more accurate to characterize these dyes in the near infrared region, where the organic functional groups’ fingerprint can more accurately be identified.
Using samples from known manufacturers and dates and the Fischer criterion’s statistical model, the author created a chromogenic processes database, to which other samples of unknown provenance can be compared to. So far, data has been collected for prints made from the 1960s up to the 2000s, by different manufacturers. Kodak samples seem to be the ones that yield better results so far (within 3% error). The author’s goal is to continue this project by analyzing more samples (particularly produced in the 1950s to 1970s) and therefore increase the accuracy of the obtained results.
This method seems to be very promising and I personally hope to hear about it again in the future.
44th Annual Meeting: Photographic Materials Session, May 16, "When Inkjet Prints Get Wet: First Contact to Weeklong Submersion," by Daniel Burge
As an emerging paper conservator, I was eager to attend Daniel Burge’s talk, “When Inkjet Prints Get Wet: First Contact to Weeklong Submersion.” I wanted to expand my understanding of this type of print that seems to be so fragile and difficult to preserve. Is there any hope for these objects after a water emergency?
The aim of Burge’s research was to critically assess the damaging effects of water on modern inkjet prints to develop disaster response protocols that maximize emergency response and recovery efforts of a damaged collection. Many types of inkjet prints were immersed in water for increasing increments of time: 1 second, 10 minutes, 1 hour, 8 hours, 24 hours, 48 hours, and 7 days. Damage to the colorants, paper coatings, and paper supports were recorded. The majority of inkjet prints proved to be damaged after one second of immersion. Some inkjet prints remained fairly stable during extended periods of immersion. This allows an emergency response timeline to be made focusing rescue efforts on saving prints that have some stability when exposed to water.

Burge’s research also revealed that pigment colorants were generally more stable than dye colorants; and prints made on polymer or uncoated fine art papers were the most susceptible to damage. However, some anomalies of the statement above were observed. Burge explained that stability is not only related to the materials incorporated in the inkjet prints but that it is also linked to the relationship between the colorant and the coating as well as the relationship between the coating and the support.
In conclusion, Burge stressed the following points:
- Priorities may be assigned to a collection based on a thorough understanding of the colorants, coatings, and supports of inkjet prints coupled with the results of this research guiding emergency response efforts during a water incident.
- Good housing and storage methods may help to reduce potential water damage.

Several people added to the presentation through their questions and comments. All agreed that IRIS prints are incredibly sensitive to moisture. A question was asked, raising the ethics of printing a new inkjet print from a file to replace a damaged print. Burge replied that even though this is possible, there is a unique relationship between the artist and the original, damaged print. We should be considerate of the significance of the original before making a reprinted version. I felt that I had gained a better understanding of the issues surrounding the inkjet print’s sensitivities to water that would allow me to better care for a collection. I greatly admired Burge’s enthusiasm and authority in this subject matter as well as his poise as a speaker.
An overview of Burge’s project and helpful information may be found on the home page of the Image Permanence Institute’s DP3 Digital Print Preservation Portal under the ‘Flood’ tab: http://www.dp3project.org/
44th Annual Meeting – Photographic Materials Session, May 16, “Photochromatic Images of Edmond Becquerel: Where do the colours come from? Tracks in the understanding of the origin of their colours.” by Dr. Marie-Angélique Languille, Edouard de Saint-Ours, Jean-Marc Frigerio, and Christine Andraud
Edouard de Saint-Ours clearly described the fascinating work he and his colleagues have done to identify the source of the colors in one of the earliest color photographic processes. In 1848 Edmond Becquerel successfully produced a color photographic image, but himself was unable to identify the cause of the colors. The discovery of several of his early plates in the archives at the National Museum of Natural History in Paris sparked Edouard and his colleagues’ interest in Becquerel’s process and the source of his colors.
Edouard began by explaining the two known ways in which color can be produced in photography: through the use of colorants, or through the production of interference colors. It was assumed that Becquerel had been relying on one of these two types of color, and the research team focused on methods of analysis that would identify either of these two methods of producing color.
Becquerel’s photochromatic images were made by dispersing sunlight through a prism for several hours, exposing the plate in camera to form a direct positive. The images were not fixed, and will fade if exposed to light. In order to understand the physical and chemical composition of the Becquerel plate, Edouard and his colleagues replicated the technique themselves. To make a photochromatic image a silver plate was polished and cleaned, and sensitized by immersion in copper chloride, or by hydrolysis in a bath of hydrochloric acid. The latter is referred to as an electrochemically sensitized plate. Once sensitized, the plate takes on a red-brown hue. In the replication of the process the plates were exposed to a Xenon lamp with colored filters, and the colors produced on the plate corresponded to the color of the light.
Once they had replicated the technique, they set about studying their sample plates in order to identify the cause of the colors they had produced. SEM analysis and cross-sectional analysis showed that there were no surface or structural differences between the different colors. Although this suggested against interferential colors, it did not rule out the possibility entirely.
SEM-EDX offered the researchers more information about the chemical composition of the different colors, but also indicated no difference between the green and red colors on the sample plate. Both were almost entirely comprised of silver chloride. However, Edouard mentioned the very interesting possibility that very small variations in the proportion of silver could cause different sizes of silver nanoparticles to form on the plates. In this scenario, a different size of nanoparticle would form from each color of light, and the color of the silver nanoparticles would vary depending on their size.
From this hypothesis, the researchers performed spectroscopic analysis of the colored surfaces, a technique which can detect the chemical state of an element. However, this analysis showed only oxidized silver on all colors, with no indication of difference between colors, or the presence of metallic silver. Again, this suggests against the presence of silver nanoparticles, but does not definitively rule out that possibility.
Although the project has not returned any definitive results, the research is ongoing. In the meantime, the work has cast light on the complexity of Becquerel’s early process, and the intriguing questions still presented by early color photography.
44th Annual Meeting – Photographic Materials Session, May 16, “Understanding Temperature and Moisture Equilibration: A Path towards Sustainable Strategies for Museum, Library and Archives Collections,” by Jean-Louis Bigourdan
Preventive conservation is becoming an increasingly important part of our work as conservators, but it often seems that many important questions about environmental control have yet to be answered. Questions such as to what degree are fluctuations of temperature and RH humidity damaging to collections, and are they more or less damaging than strictly maintained but not ideal conditions?
Jean-Louis Bigourdan addressed some of these uncertainties in his talk on temperature and moisture equilibration in storage spaces containing significant quantities of hygroscopic materials. He focused on reconciling the need for climate-controlled storage with the quest for sustainability and the pressure of budgetary limitations. His introduction was reassuring: the current thinking on storage climate is that relatively stable low temperatures are desirable (“cool storage”), but there is little benefit to maintaining a perfectly stable climate (i.e. without fluctuations). Rather, a certain degree of cycling is acceptable, so long as the shifts are not extreme.
Following from this fact, Jean-Louis presented the concept of “dynamic management” of HVAC systems. Dynamic management entails shutting down the HVAC for short periods, such as overnight, and adjusting climate set points seasonally. This would save on energy, and thus reduce the environmental impact and cost of operating such systems. Of course, we as conservators are immediately concerned with the effect on collections materials during such shutdowns: How extreme are the fluctuations in temperature and RH resulting from periodic shutdowns of the HVAC?
This is the questions Jean-Louis attempted to answer through two phases of testing. He was particularly focused on the possibility that collections containing large quantities of cellulosic and/or hygroscopic materials might buffer against large or sudden shifts in temperature and RH. Jean-Louis undertook two phases of testing to understand the extent of the self-buffering capabilities of such materials. The first round of testing was conducted in the laboratory, and the second in library and archive collections storage rooms.
In his laboratory tests he exposed different types of materials to large fluctuations in temperature and RH. The materials included things like closed books, matted photographs and drawings in stacks, and stacks of unmatted photographs. He also tested the effects on these materials when they were placed inside cellulosic microenvironments, such as archive storage boxes, measuring the temperature and RH at the surface of objects, and at their cores. His results indicated that the RH at the core of books or stacks of cellulosic material does not change as rapidly as the exterior environment. Temperature equilibration occurred over a period of hours, and moisture equilibration occurred over the course of weeks or even months. Microenvironments increased the time to equilibration, mostly by controlling diffusion of air.
Another useful result of this laboratory experimentation was that it demonstrated that the moisture content of paper-based and film collections was more affected by environmental temperature than by environmental RH. In other words, at the same exterior RH, the moisture content of the collections object was lower at higher exterior temperatures. The laboratory testing therefore suggested that storage spaces with significant quantitates of hygroscopic materials will be buffered against large changes in RH and temperature due to moisture exchange with the collections materials.
Jean-Louis found that field testing in collections storage spaces returned many of the same results as his laboratory tests. 6-8 hour shutdowns of HVAC systems had little impact on environmental RH, and many of the systems they examined were already following seasonal climate cycles without causing dramatic shifts in the temperature or RH of storage environments. He encouraged conservators to take their collections materials into account when evaluating the buffering capacity of their storage environments.
I was very encouraged by these findings, although I have some remaining questions about the potential effects on collections materials. How much moisture is being exchanged with collections items in such a scenario? Is it enough to cause dimensional change in hygroscopic materials, especially on exterior surfaces, and will that contribute to more rapid deterioration in the long term? Regardless, I was happy to be prompted to remember that collections materials are an active part of the storage environment, not an unreactive occupant of it.
The talk wrapped up with Jean-Louis raising a few areas of further research. He hypothesized that changes in storage climate which are achieved through a series of small but sharp changes would result in slower moisture equilibration between environment and collections than would a change made on a continuous gradient. He also raised the possibility of predicting the internal moisture fluctuations of collections materials using their known hygroscopic half-lives. Both of these areas of research could be extremely helpful to conservators attempting any dynamic management of their climate control systems.
A particularly thoughtful question by an audience member provided the opportunity for more climate control wisdom. A Boston-area conservator of library and archive collections wondered whether it made sense to use dew point as the set point on HVAC systems in the winter to save money on heating costs, but during the summer to use RH as the set point to insure against mold growth. Jean-Louis felt this would be an unnecessarily complicated method of control, but offered a general rule for the storage of hygroscopic collections. He suggested thinking of lower temperatures as the primary goal, and of RH as important to maintain within a broader range. Lower temperature slow degradation reactions inherent to such materials, and so generally lower is better. However, RH need only be high enough so as not to embrittle material, but low enough to prevent mold growth. Essentially he suggested that if your RH and temperature are too high, you are better off reducing temperature slightly, which will slow degradation reactions, and as a side-effect your collections may absorb a small amount of moisture, thereby lowering the RH in the building environment.
Jean-Louis’s talk left me intrigued and excited about the possibility of taking advantage of hygroscopic collections materials to provide a more stable and sustainable storage environment.
44th Annual Meeting- Joint Photographic Materials + Research and Technical Studies Session- Surface Roughness, Appearance and Identification of AGFA-Gevaert Photograph Samples- by Dr. W. Wei and Sanneke Stigter
Having encountered some very bizarre textures in matte Gevaluxe prints during a National Portrait Gallery internship several years ago, I was eager to learn more about the characterization of these interesting papers. The popular Gevaluxe papers (made by Belgian company Gevaert) often had a velvety matte appearance that was desired by many mid-twentieth century photographers.
This project was inspired by a concern that the increasing reliance of museums on digital surrogates for original photographs might not capture all of the original properties of the photograph. Even where a traditional silver-gelatin or chromogenic photograph has been used as a surrogate, the textured surface of the replacement paper might not match the original. The work Hoe Hoeker Hoe Platter by Dutch artist Ger Van Elk was used as an example of a mixed media photographic work where texture played an important role in conservation decisions. Texture can influence the perception of color, so it was important to characterize the essential properties of the paper’s texture.
Paul Messier’s research was considered an important first step, but Bill Wei’s research team in the Netherlands sought to leverage some of the technology from other industries where surface texture and roughness are systematically quantified (such as the auto industry). First, Wei gave an overview of some of the techniques employed in texture measurement: polynomial texture mapping and confocal white light profilometry. In this project, confocal white light profilometry was used to create a non-contact contour map with a resolution of 60 nanometers. Gloss measurements were also used; on a matte surface the difference between incident and reflected light is the light scattered, so the glossiness (or lack thereof) can be quantified.
The study compared human perception with quantitative texture measurements in observations of textured paper and their apparent roughness or smoothness. An Agfa-Gevaert sample book from the 1970’s served as the source material. Only three of the samples were color papers, so they were more difficult to evaluate. The 25 samples were categorized into 5 groups. Some of the groups had a “macro” texture of waviness, versus a “micro” texture of roughness on a much smaller scale. Group 1 was smooth. Group 2 papers had a very fine texture. Papers assigned to Group 3 displayed the fine texturing in the Group 2 papers, combined with a large-scale waviness. Group 4 exhibited the waviness of Group 3, without the fine texture. Group 5, which included some of the color papers, was comprised of a very regular pattern of raised circular nubs or dots. For anyone who has a lot of family photos from the 1970’s, that dot texture will seem quite familiar.
The research is ongoing, so the presenter mentioned some preliminary observations, without drawing any conclusions. There was not a direct relationship between roughness and gloss. For example, samples from Groups 4 and 5 were just behind group 1 in gloss. The human observers demonstrated that their perceptions of smoothness did not always correlate with the quantitative measurements, especially for some papers in Group 2. It will be interesting to hear the follow-up results as the research team continues the project.